| Configuring
Microsoft Outlook 2010 to use Apex Secure POP3 Email
POP3
email operates where all mail is downloaded from the
server to your computer. This is mostly used when you
only use one computer to check your email. If you want
all of your mail left on the server, or check your email
from multiple computers or devices, use our IMAP Email
instructions instead.
Follow
these steps to set up Outlook 2003 to check your Apex
email account:
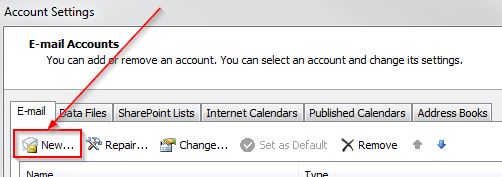
1)
In Outlook, go to the File tab, then the "Account
Settings" drop-down, then "Account Settings".
2)
Click on "New" to add a new Email account.
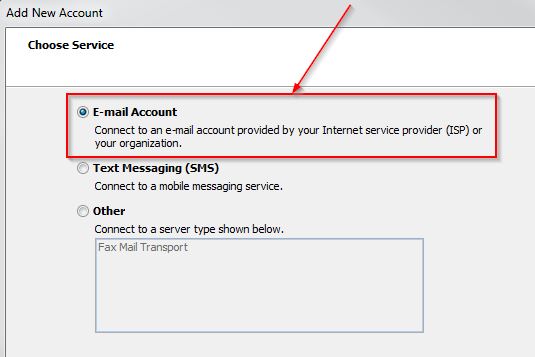
3)
Select "Email Account" and click Next.
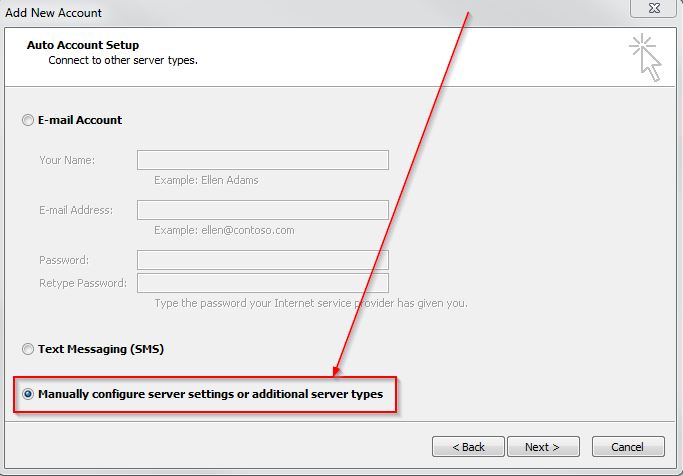
4)
Select "Manually configure server settings or additional
server types" and click Next.
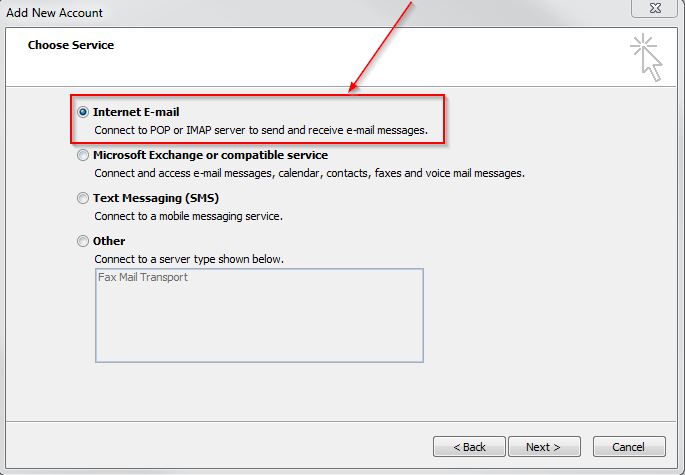
5)
Select "Internet Email" and click Next.
6)
Enter in the following fields:
- Your
Name
- Email
Address: yourname@yourdomain.com
- Incoming
mail server: mail.apex-internet.com
- Outgoing
mail server (SMTP): mail.apex-internet.com
- Username:
yourname
- Remember
password: Checked
7)
Click the "More Settings" button and then
the "Advanced" tab. Enter in the following
settings:
- Incoming
server (POP3): 995
- Check
the box for "This server requires an encrypted
connection (SSL)
- Outgoing
server (SMTP): 587
- Use
the following type of encrypted connection: TLS
- Optional
but recommended: Uncheck the box for "Leave a
copy of messages on the server".

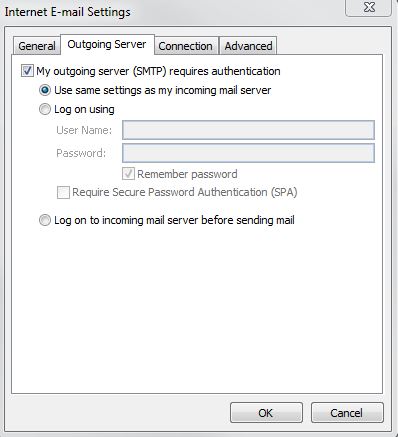
8)
Click on the "Outgoing Server" tab. Enter
in the following settings:
- Check
the box for "My outgoing server (SMTP) requires
authentication
- Select
"Use same settings as my incoming mail server".
Click
OK when you are done with your settings. Click Next
to continue.
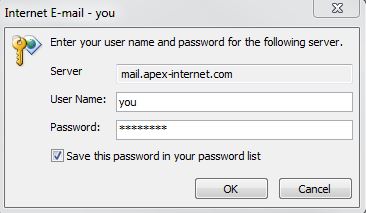
9)
An email test will commence. If you are prompted for
your username and password, enter it now and click OK.
10)
Click Finish to accept the settings. If the tests fail,
review the settings above and try again.
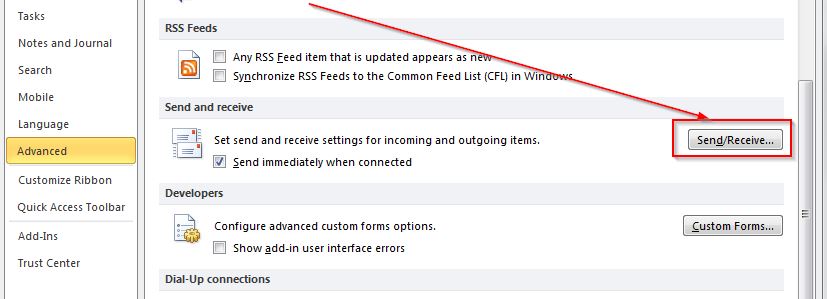
11)
Go to the File tab, then Options on the left side of
the window.
12)
Click "Advanced" along the left side of the
window.
13)
Scroll down and click on the "Send/Receive"
button.
14)
Check the options for "Schedule an automatic send/receive
every" and specify the number of minutes or leave
at the default of 30. Do NOT set for less than
5 minutes.
15)
Click Close and OK to return to Outlook.
16)
Setup is complete! You can now sent and receive your
email with Outlook.
|