| Configuring
Mozilla Thunderbird to use Apex Secure POP3 Email
Mozilla
Thunderbird is a very stable and flexible email program.
We highly recommend this program to allow easy access
to your Apex email account. To set up Thunderbird to
check your email, follow these steps:
1)
Go to the File menu, then New, then Account.
2)
Select "Email Account" and click "Next".
3)
Enter your name and email address and click "Next".
4)
Select the type of server as "POP3". For Incoming
Server, enter in "mail.apex-internet.com".
Click "Next" to continue.
5)
Enter in your email username and click Next.
6)
You can usually leave the "Account name" as-is,
and click "Next".
7)
Review the settings shown, and uncheck the option for
"Download messages now". Click Finish.
8)
Locate the new account you just created on the lefthand
pane of Thunderbird. Right-click on it and select Properties.
9)
In the list of properties on the left-hand side, click
on "Server Settings".
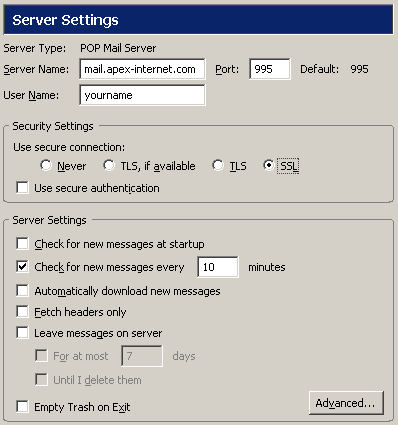
10)
Under "Security Settings", check the option
for "SSL", and click "OK".
11)
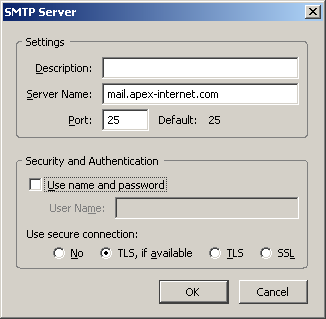
In the list of properties on the left-hand side, click
on "Outgoing Server (SMTP)". Click the "Add"
button and enter in the Server Name of "mail.apex-internet.com".
Be sure to uncheck the option "Use name and password",
and click OK.
11)
Setup is complete, you can now click the "Get Mail"
button and Thunderbird will now be able to send and
receive with your Apex account!
|